How to Fix a Key That Fell Off Your Acer Chromebook
Introduction
If you find yourself dealing with a key that fell off your Acer Chromebook, don’t worry. This common issue can be fixed with some patience and the right tools. Fixing the key yourself can save time and money, plus it gives you the satisfaction of resolving the problem independently. In this guide, we walk you through every step to get your key back in place and your Chromebook working smoothly again.
Identifying the Problem
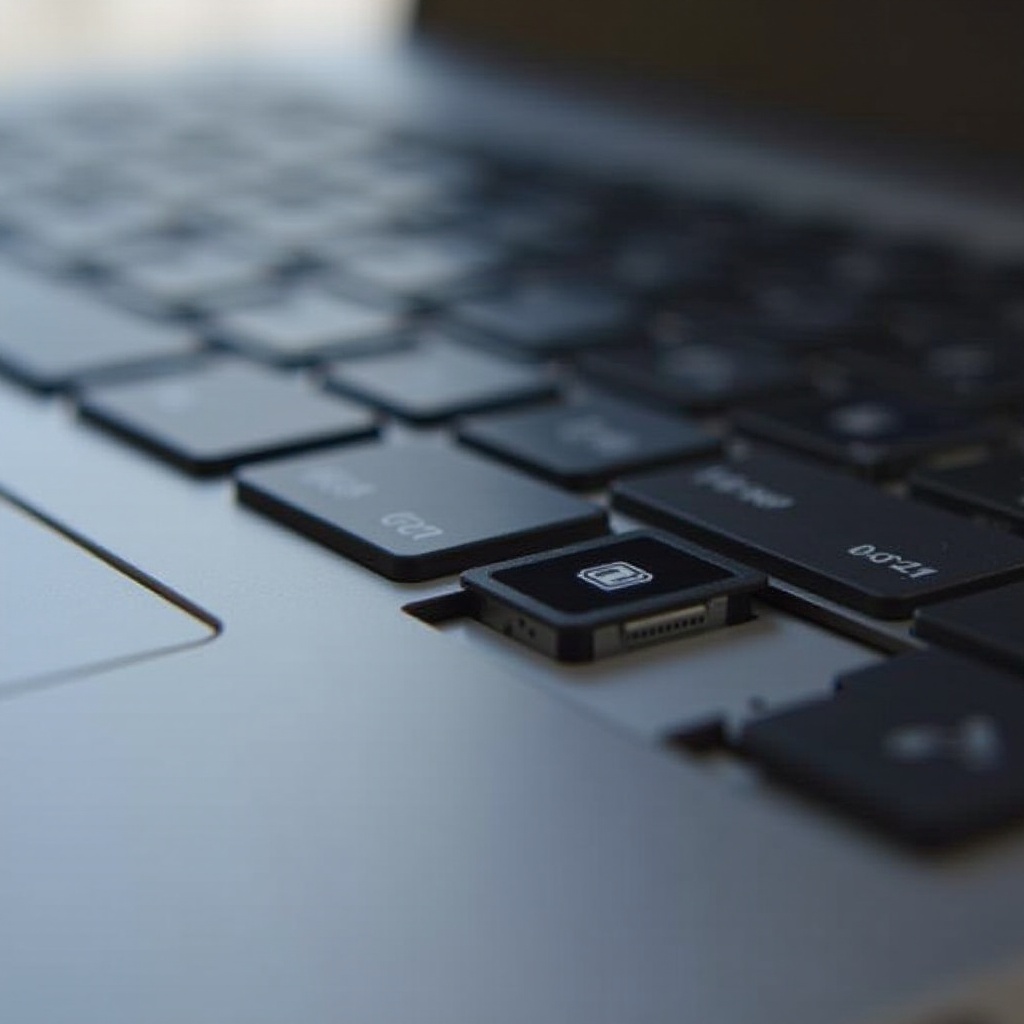
Before jumping into the repair, it’s crucial to identify the problem correctly. There are several reasons why a key might fall off. Sometimes it’s due to wear and tear, while other times, it can be because of accidental damage. Inspect the fallen key and the space it came from to see if there are any visible damages or if any parts are missing.
- Check the keycap for cracks or breaks.
- Inspect the retainer clips (the small plastic pieces that hold the keycap).
- Look at the rubber nub on the keyboard base.
Understanding whether the key itself is broken or if the problem lies in the keyboard base or the retainer clips will help you understand the next steps.
Gathering Needed Tools and Materials
Now that you’ve identified the problem, it’s time to gather the tools and materials you’ll need. Having everything on hand before you start will make the process smoother and quicker.
- Small flathead screwdriver
- Tweezers
- Isopropyl alcohol and a cotton swab (for cleaning)
- Replacement key parts, if necessary
Make sure you have a clean workspace to lay out all the parts and tools. This will help you keep everything organized and avoid losing any tiny components.
Detailed Step-By-Step Guide to Reattaching the Key
With your tools ready, follow these detailed steps to reattach your key:
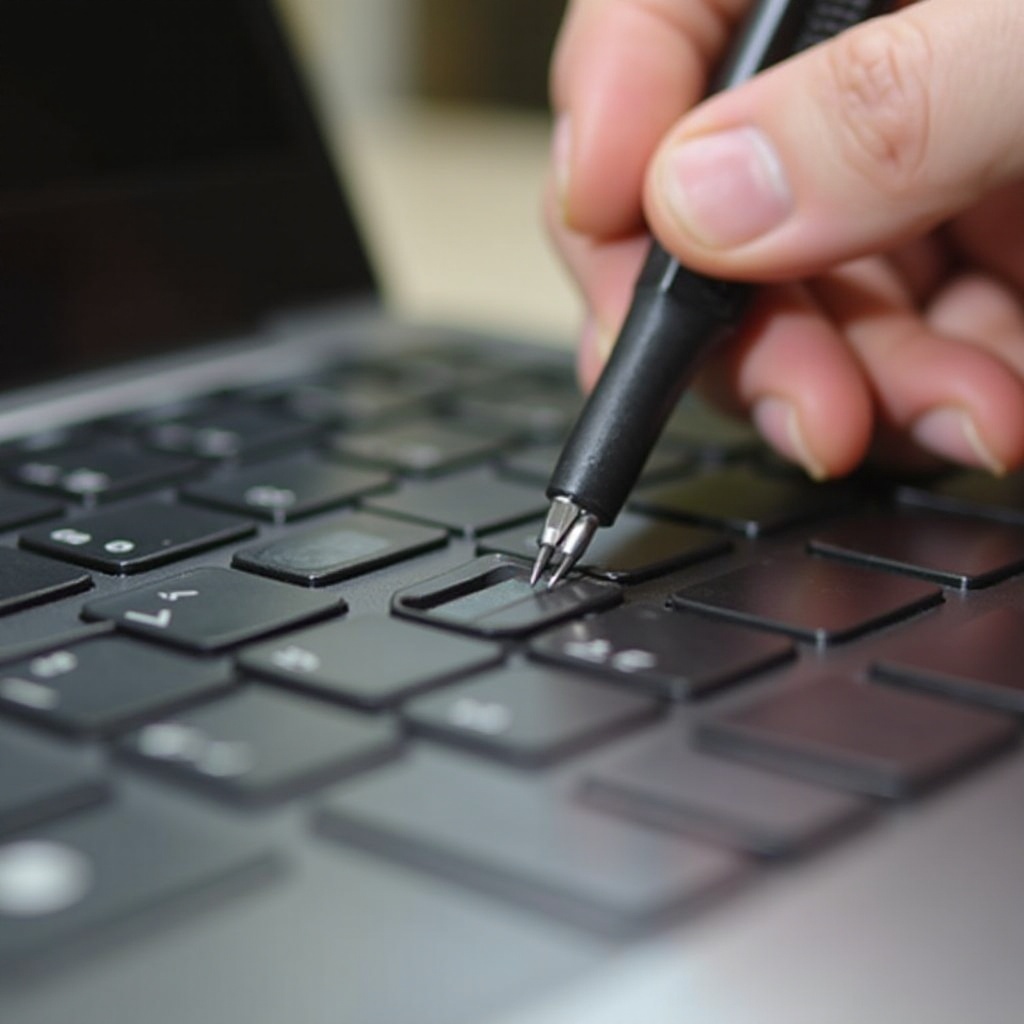
Removing the keycap and the components properly
- Gently remove any remnants of the broken key or components: Use a small flathead screwdriver or tweezers to carefully lift out the broken pieces.
- Clean the area with isopropyl alcohol: Dip a cotton swab in isopropyl alcohol and gently clean the spot where the key fell off. This will remove any dirt or residue that could interfere with the reattachment.
Aligning the retainer clips
- Reattach or replace the retainer clips: If the clips are damaged or missing, place the new ones in the right spot. They should fit snugly into the slots on the keyboard base.
- Ensure the clips are in the correct orientation: The clips should align perfectly with the slots. They should not be loose or wobbly.
Reattaching the keycap securely
- Position the keycap over the retainer clips: Make sure the keycap is correctly oriented over the clips.
- Press down gently yet firmly: Use even pressure to push the keycap into place until you hear a click. This indicates that the key has been secured properly.
Common Mistakes to Avoid
While the process might seem straightforward, there are common mistakes you’ll want to avoid to ensure a successful repair:
- Forcing the keycap: Pressing too hard or forcing the keycap can break it or damage the retainer clips. Ensure you apply even gentle pressure.
- Incorrect clip orientation: Make sure the retainer clips are aligned correctly. Misalignment can cause the key to not function properly or fall off again.
- Neglecting to clean the area: Dirt or residue can prevent the key from being reattached securely. Always clean the area before proceeding with the repair.
Testing the Fixed Key
Once you’ve reattached the key, it’s important to test it to ensure it’s working correctly.
- Press the key multiple times: Ensure it feels the same as the other keys and bounces back properly.
- Type a few sentences: Ensure that the key registers the correct character every time it is pressed.
- Check for wobbling: The key should not feel loose or unsteady.
If the key doesn’t work, you may need to reopen it and check that all components are properly aligned and secured.
Maintenance Tips to Prevent Future Issues
To avoid dealing with fallen keys in the future, here are some maintenance tips:
- Clean your keyboard regularly: Use compressed air to blow out any dust and debris.
- Handle with care: Avoid excessive force when typing and be gentle if you need to remove keys for any reason.
- Protect your keyboard: Consider using a keyboard cover to protect against spills and dirt.
By following these tips, you’ll extend the lifespan of your keyboard and avoid the hassle of dealing with fallen keys.
Conclusion
Fixing a key that fell off your Acer Chromebook might seem daunting, but with the right tools and steps, it’s a manageable task. By identifying the problem accurately, using the correct tools, and carefully following the steps, you can restore your Chromebook to full functionality. If you continuously maintain your keyboard and follow the prevention tips, you can avoid encountering this issue again.
Frequently Asked Questions
How long does it take to fix a key on an Acer Chromebook?
Usually, the process of fixing a single key takes about 15-30 minutes, depending on your familiarity with the steps and whether you need to replace any components.
Do I need to buy a new key if one falls off?
Not necessarily. Often, you can reattach the existing key if the keycap and retainer clips are intact. However, if any parts are damaged or missing, you may need to purchase replacements.
Is it safe to use an external keyboard temporarily?
Yes, using an external keyboard is a great temporary solution while fixing the fallen key on your Chromebook. Ensure it’s properly connected to avoid any damage or data loss.


